
Mehndi, or henna, is an ancient art form that has embellished hands and feet for centuries, especially in South Asia, the Middle East, and Africa. More than only a temporary tattoo, mehndi is a symbol of celebration, beauty, and good fortune, which is often applied during weddings, festivals, and special ceremonies. While complex patterns created by professional mehndi artists can be breathtaking, many feel frightened by early alleged complications. However, the beauty of mehndi lies in its versatility; There are countless designs that are not only surprising but also incredibly easy to master for the newbies. This broad guide is dedicated to empowering beginners with confidence and inspiration to try their hand at mehndi. We will explore the world of “beginner cute simple mehndi designs for front hands”, which are perfect for any occasion, from cultural gate-tutors to festive celebrations. Our focus is on simplicity, elegance, and attraction, ensuring that anyone can achieve beautiful results, regardless of artistic experience. We will engage in ten different designs, detailed descriptions, tips for application, and provide insight into their appeal. So grab your henna cones, get comfortable, and get ready to highlight your internal mehndi artist!
Understanding the Basics Before You Start
Before considering the designs, let’s look at some essential basics to ensure a smooth and enjoyable mehendi experience:
- Quality Henna Cone: The success of your design largely depends on the quality of your henna paste. Always choose natural, fresh henna cones obtained from reputable sources. Avoid “black henna” as it often contains harsh chemicals that can cause a severe allergic reaction. Natural henna stains usually appear orange-brown and darken in 24-48 hours.
- Preparation is key: Wash your hands thoroughly with soap and water to remove any oil or lotion. Exfoliate gently for a soft canvas.
- Lighting and comfort: Work in a well-lit area where you can sit comfortably without any interruptions. This will help you maintain a steady hand.
- Practice makes perfect: Don’t be afraid to practice basic lines, points, and curves on a piece of paper before applying them to your skin.
- Aftercare: After applying mehendi, let it dry completely. Avoid washing your hands or getting them wet as much as possible (ideally for 6-8 hours, or even overnight). Gently scrape away the dried paste; Don’t wash it. Applying balm or natural oil (such as olive or coconut oil) after scraping can help deepen and lengthen the stain.
Now, let’s check out our top 10 “Beautiful Simple Mehndi Designs for Front Hands for Beginners”!
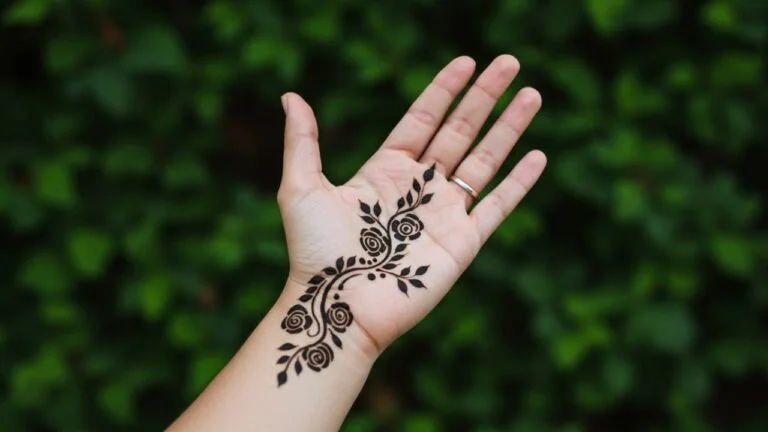
1. The Classic Single Vine Trail
Design concept: This is probably the most fundamental and universally loved design. It contains a single, beautiful vine-like mark that moves with a finger, extending to the back of the hand. It is elegant, understandable, and incredibly easy to execute.
How did you make this:
Start by drawing a central vein or line towards the wrist with your middle finger (or any finger that likes any finger), stop halfway or two-thirds by hand. With this central line, attract small, symmetrical leaf shapes or tear motifs on alternative sides. You can also add small dots around the leaves to increase the pattern. Keep the spacing consistent for a clean look.
Why is this perfect for beginners?
- Minimum freehand drawing is required.
- It is easy to master repetitive elements.
- It seems sophisticated without being complicated.
- Can be done quickly.
Occasion: perfect for everyday wear, casual outings, or when you want a hint of traditional charm without being overpowering.
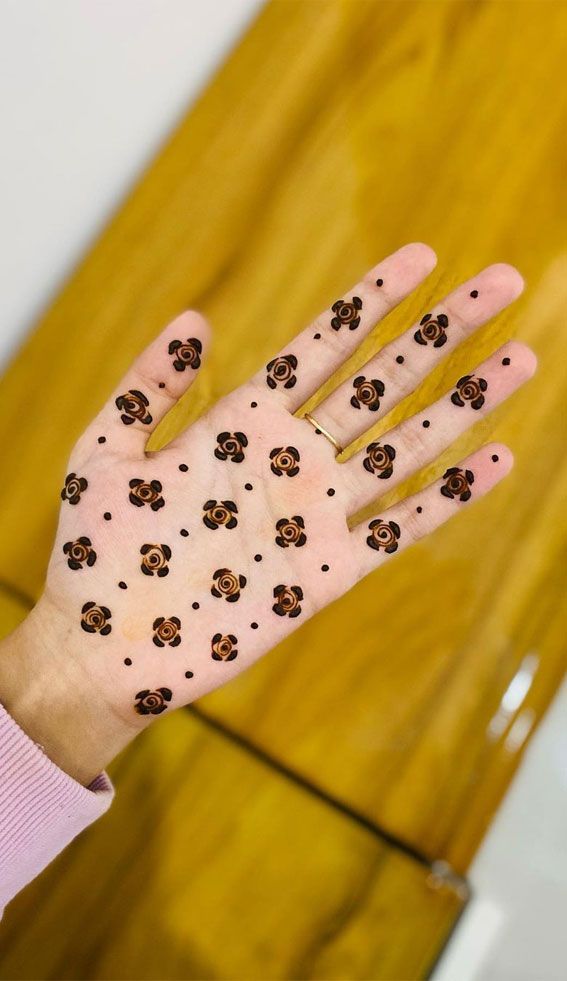
2. The Simple Floral Dot Cluster
Design concept: This design focuses on a small, attractive floral figure made with dots and simple petals, usually focused on the back of the hand or near the wrist. It is an adorable and very forgiving design.
How did you make this:
Start by placing a medium-sized dot in the center of your desired area (eg, behind your hand). Surround this central dot with 5-7 small dots, which make a circle to represent petals. For more defined flowers, you can expand these small dots into small, simple tear-shaped shapes that indicate outward. Add some scattered dots around the main floral cluster for additional visual interest.
Why is this perfect for beginners?
- The dots depend a lot more, which is easy to control.
- No complex line work is required.
- The dots can be endlessly diverse by changing size or groups.
- Looks and invites “cute”.
Occasion: Adding a touch of sweetness to school events, ideal for casual parties, or your look.
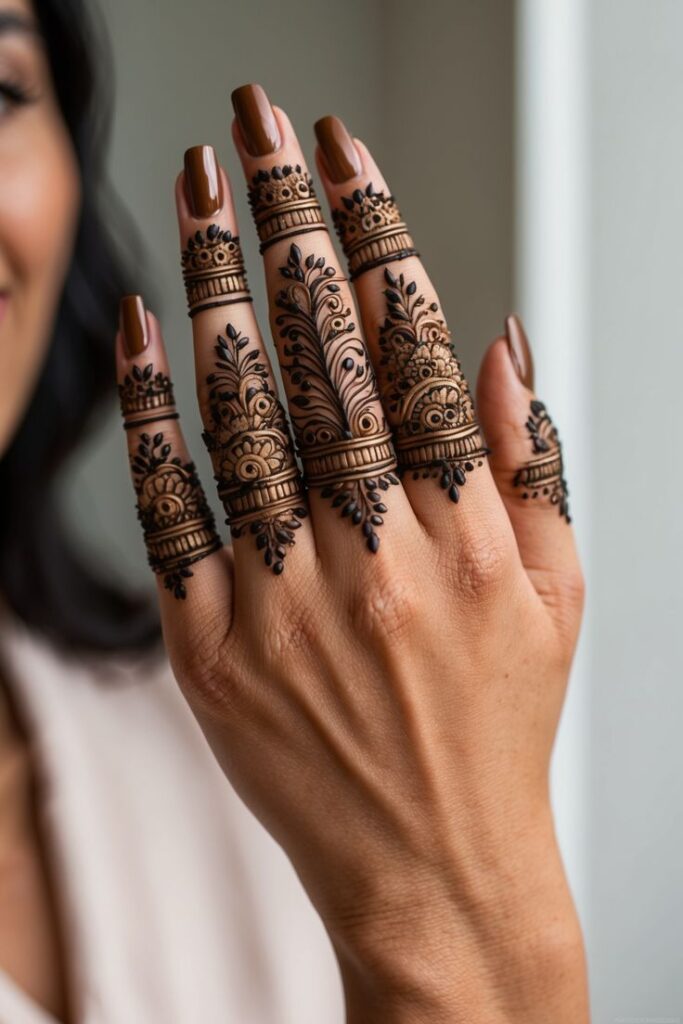
3. The Minimalist Finger Cuff
Design concept: Instead of a full-hand design, the finger cuff is fully focused on one or more fingers, which produces a “ring” or “phlegm” effect with ordinary bands and small patterns. It is modern, chic, and incredibly initial-friendly.
How did you make this:
Choose a finger (index or middle finger works best for prominence). Drawing a thin band around the base of the finger, mimicking a ring. Above or below this band, you can draw another thin band or add a simple pattern: a row of small dots, a series of small scallops, or a small floral figure. Repeat on other fingers for a harmonious look, or place it on just one for minimal elegance.
Why is this perfect for beginners?
- Small canvas, low pressure.
- It is easy to attract geometric shapes.
- Quick drying time for individual elements.
- Trendy and contemporary.
Occasion: Great to wear office, a subtle personal touch, or a layered look with real jewelry.
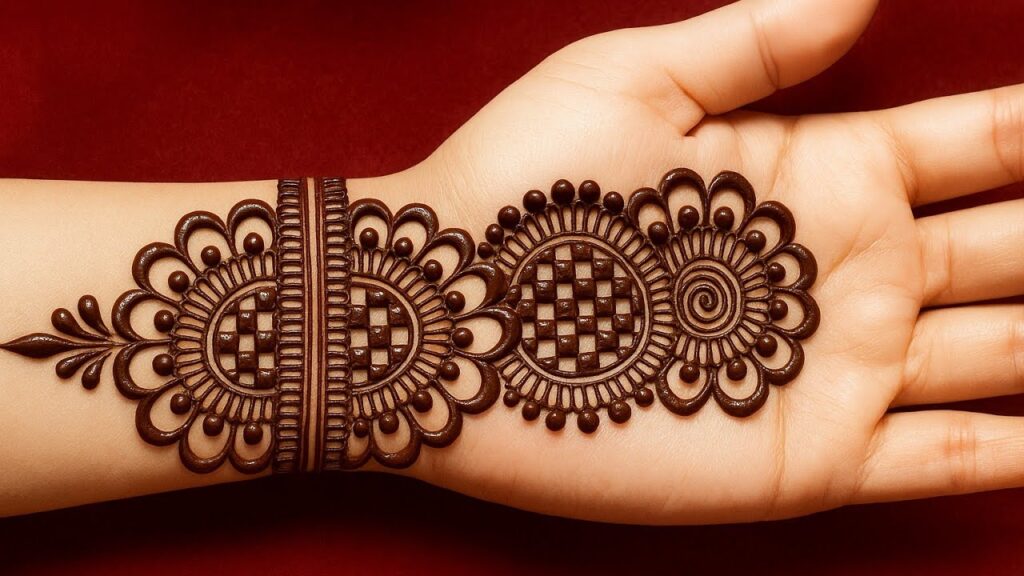
4. The Dot-and-Dash Bracelet
Design concept: This design mimics a delicate bracelet around the wrist, using a combination of dots and small lines (dashes) to create an attractive, sensible pattern.
How did you make this:
Start by drawing a clean, thin line around your wrist, based on your “bracelet”. Make a pattern of alternative dots and dashes below or above this line. For example, a dot, then a small dash, then another dot, and so on. You can also distinguish the dots’ size or the length of the dash for texture. For a more ornate look, add the same small floral or leaf shape directly above the main line.
Why is this perfect for beginners?
- Simple geometric elements.
- It is easy to maintain repeated patterns.
- There is no need to fill the right decrease or complex.
- Looks like a real piece of jewelry.
Occasion: Semi-formal events, daily wear, or the pronunciation of a large design on the hand works well.
5. The Simple Wrist Garland
Design concept: A variation of the bracelet, the wrist garland has a slightly comprehensive band of interconnected motives – often leaves, the heart, or small scallops – that form a “garland” around the wrist.
How did you make this:
To define the width of your garland, two parallel thin lines around your wrist, in addition to a centimeter. Between these two rows, draw a repetition pattern of simple shapes. For example, draw a range of small, connected hearts, or a series of scallops going upwards (like a string of beads). You can fill these shapes or leave them as outlines. Make sure the size is small and similar.
Why is this perfect for beginners?
- Defined boundaries become easier to live within.
- Repel patterns are forgiving.
- Creates a full-fledged look without complexity.
Occasion: festivals, family functions, or whenever you want a little more noticeable but still simple design.
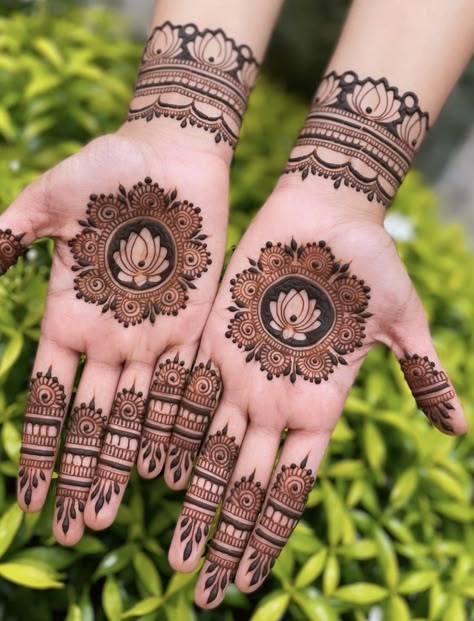
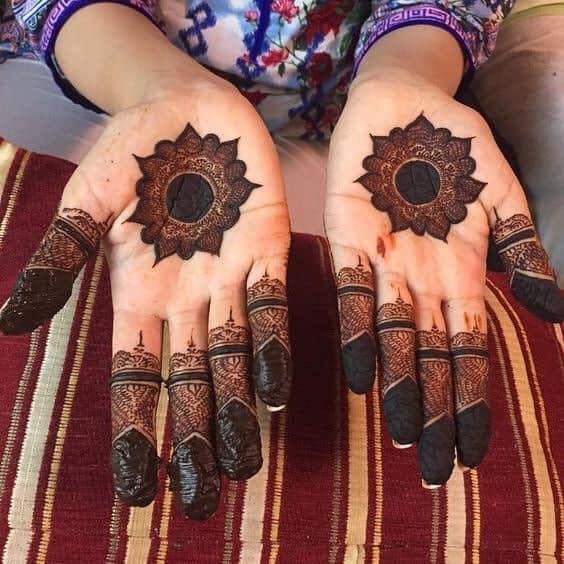
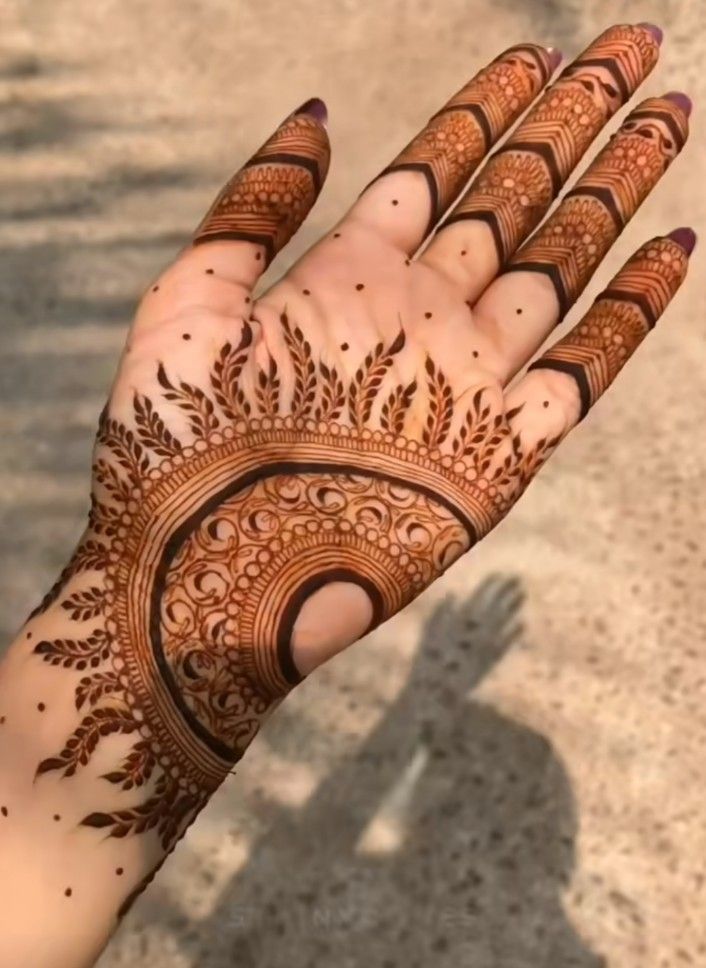
6. The Minimalist Mandala Dot
Design concept: A small, simplified mandala that focuses on a central dot outward with some simple rings of the pattern, usually placed behind the center or hand of the palm. This is an introduction to mandals without heavy expansion.
How did you make this:
Keep a major point as the very center of your mandala. Draw a thin circle around this dot. Now, around that circle, draw a ring of small scallops or a series of small dots. If you want, you can add another simple ring, perhaps a line of small tear figures, indicating outwards. Keep the entire design small, perhaps not greater than a coin.
Why is this perfect for beginners?
- The controlled size prevents heavy expansion.
- Concentric circles are easier than a freeform pattern.
- Focuses on symmetry, which can be obtained with simple elements.
- Introduces the concept of mandals.
Occasion: meditation, spiritual events, or when you want a meaningful yet simple design.
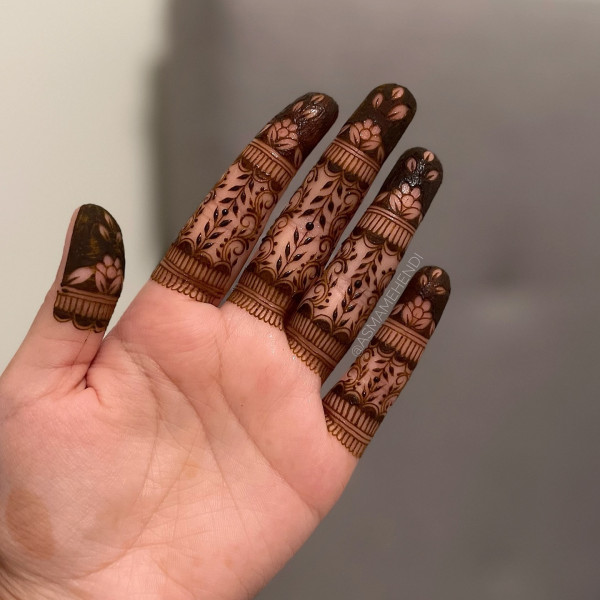
7. The Single Finger Arabic Motif
Design concept: Inspired by Arabic Mehndi, this design has a single, bold, and flowing floral or pacele elements that extend with a finger and slightly to the back of the hand. Arabic designs are known for their vastness and less complex filling.
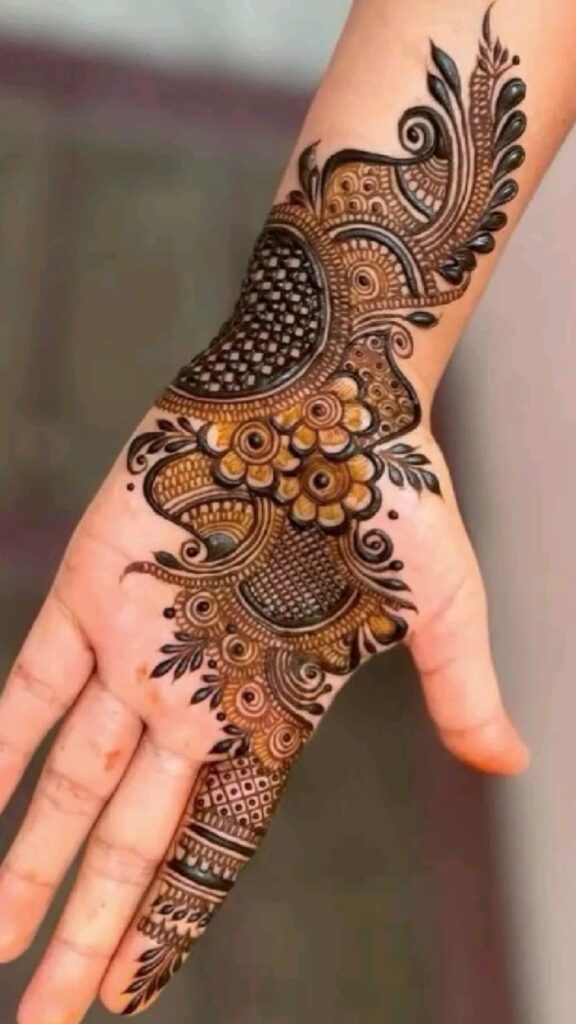
How did you make this:
Choose a finger. Start with a simple leaf or a curved paasley shape at the base of the nail. With this, draw a winding line spreading the finger on the hand side. With this line, add some more simple leaf or tearful shapes, connecting them with grace. You can fill parts of shapes with solid henna for a boulder look, or leave them as an outline. Avoid complex cinematography to an initial-friendly approach.
Why is this perfect for beginners?
- Emphasizes clean lines and open places.
- Low elements to manage.
- The flowing nature is forgiving of minor flaws.
- Specific and elegant.
Occasion: Weddings (For Guests), Engagement Parties, or any festive event where you want a touch of traditional grandeur without the complexity.
8. The Geometric Finger Art
Design concept: Going away from traditional curves, this design uses simple geometric shapes – lines, squares, triangles, or diamonds – to create a modern and pointed form, usually on the fingers.
How did you make this:
Behind your fingers, pull a series of parallel thin lines, either vertical or horizontal. Alternatively, create small diamond shapes along the length of a finger, connected to their points. You can also use small, stuffed squares or triangles to create a minimum pattern. The key is clean, straight lines (use a ruler on paper if you need to practice first!) And frequent vacancy.
Why is this perfect for beginners?
- For some, straight lines are often easier than the right curves.
- Contemporary and unique beauty.
- There can be a very minimal or slightly boulder with filling.
Occasion: fashion events, parties, or when you want a non-traditional, modern mehndi look.
9. The Sweetheart Line
Design concept: This attractive design has a string of small connected hearts that move with a finger down and have a little bit on the hand, or forms a delicate bracelet around the wrist.
How did you make this:
Decide on your placement – either with a finger or around the wrist. Start by preparing a small, simple heart outline. Immediately attract another small heart, adjacent to this, allowing the curved sides to touch slightly, forming a continuous chain. Repeat this process, keeping the hearts in a small and equal shape. For variation, you can fill in every other heart or add a small dot inside each one.
Why is this perfect for beginners?
- The heart is a familiar and easy shape to draw.
- Digitate pattern creates confidence.
- Very cute and endurance.
Occasion: Valentine’s Day, anniversary, or simply expressing affection and happiness.
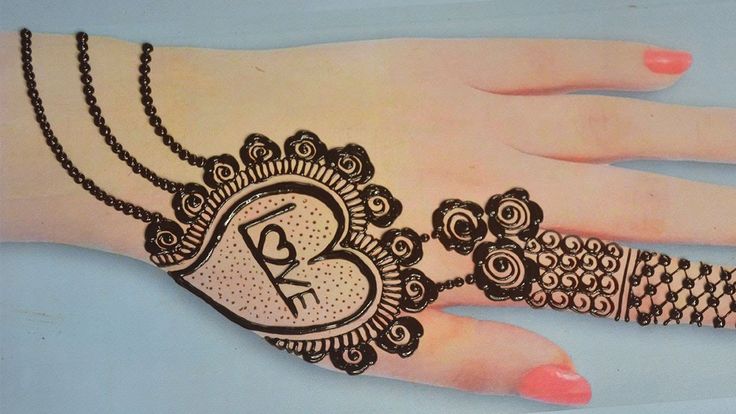
10. The Simple Palm Border
Design concept: This design focuses on framing the palm with a beautiful yet simple limit, making the center the center relatively clear. It is elegant and exposes the shape of the hand.
How did you make this:
Start by drawing a thin line that detects your palm outline, following the natural curve from the base of the thumb, ending around the edge of the hand, and near the base of the pinky finger. This creates your primary range. With this line, add a range of small, similar scallops, dots, or small leaf shapes that point to the palm. You can add a second, parallel line to a boulder frame within the first. Keep the elements small and off for a delicate effect.
Why is this perfect for beginners?
- The natural hand follows the shape, which makes the placement easier.
- The repetitive boundary elements are simple.
- The minimum creates a grand form with complex work.
- Allows the hand to be open and expressive.
Occasion: Formal events, weddings (as a guest), or any occasion where you want an elegant and substantial mehndi design without the complexity of a full-hand pattern.
General Tips for Beginners to Enhance Your Designs:
Consistency is important: aiming for equal pressure on your henna cone to produce frequent thickness lines and dots.
- The first outline, then fill: You want to fill, for the size, prepare the first outline, and let it dry slightly before filling the interior. This prevents bleeding.
- Less is more: Especially when starting, do not try to crawl a lot of elements in a small space. Simple, clean designs often look the most elegant.
- Take your time: don’t hurry! Mehndi is an art that requires patience.
- Returning the mistakes: If you make a small mistake, you can gently scrape a toothpick with a toothpick or cotton broom with a wet henna. Hurry it before it stains.
- Experiment with finger design: don’t forget the fingers! Adding small dots, ring or ordinary bell trails on the fingers can also greatly increase the design of the palm or wrist.
- Dot Placement: Dots are your best friends! They can fill the gaps, create textures, and add delicate detailing without much effort.
- Glitters and ornamentation: Once your mehndi becomes dry, you can add skin-safe glow or small adhesive gems for extra brightness, which are perfect for festive opportunities.
Beyond the Designs: The Joy of Mehndi
The task of applying mehndi is a medical and creative process. It is still a chance to connect with a beautiful tradition, express your artistic side, and beautify yourself in such a way that the temporary is yet impressive. These “early cute simple mehndi designs front hands” are not just patterns; They are pushing stones in a rich cultural art form.
If your first effort is not correct, then do not be discouraged. Even experienced artists have their days closed. Anand comes from the journey of creation and learning. With a little practice, a stable hand, and inspiration from these designs, you will soon be confidently making beautiful mehndi patterns that will attract praise and spark conversations. Whether you are preparing for a festival, a family celebration, or simply want to add a touch of beauty to your everyday life, these easy-to-master mehndi designs provide the correct starting point. Embrace art, enjoy the process, and tell your hands the story of elegance and attraction! Happy Mehndi-ING!


